How to Add Check Boxes in Canva (2026): 5 Easy Steps
Introduction to Adding Check Boxes in Canva
Imagine you're planning a big event or simply trying to organize your daily tasks. You want an easy way to track your progress and ensure nothing slips through the cracks. This is where the power of check boxes comes into play. When you add check boxes in Canva, you transform your designs into interactive and organized masterpieces, perfect for creating checklists, to-do lists, and forms. Whether you're managing a project or just keeping track of personal tasks, these little squares can make a big difference.
Canva, known for its user-friendly interface, offers a versatile platform for both beginners and seasoned designers. With Canva, you can easily incorporate check boxes into your designs, enhancing their functionality and visual appeal. The platform's drag-and-drop simplicity allows you to create an interactive checklist in Canva effortlessly. This feature is not only beneficial for personal projects but also for professional use, such as creating business forms or educational materials.
One of the standout features of Canva is its extensive library of templates and elements, which includes a variety of check box designs. You can choose from predefined templates or customize your own, ensuring your checklist aligns perfectly with your design theme. The ability to personalize these elements means you can maintain your brand's aesthetic while adding practical functionality.
Whether you're creating a simple checklist to streamline your daily tasks or a detailed form for a project, Canva's tools make it easy to design with precision and creativity. By integrating check boxes, you not only organize your content but also engage your audience, making your designs more interactive and effective. So, next time you need a checklist, consider the ease and versatility of using Canva to bring your ideas to life.
Benefits of Using Check Boxes in Canva Designs
When considering the integration of check boxes into your Canva projects, the benefits extend far beyond mere aesthetics. These simple yet powerful tools can transform your designs into interactive, organized, and visually appealing content. Let's delve into the advantages of adding check boxes in Canva, especially when you want to add check boxes in Canva free and create an interactive checklist Canva .
Enhanced Organization
Check boxes are instrumental in maintaining order within your designs. Whether you're creating a checklist for a project or a to-do list for personal tasks, check boxes offer a clear and concise way to track progress. By marking tasks as completed, you can quickly visualize what remains to be done, reducing the risk of overlooking important tasks. This feature is particularly useful for project management, where keeping track of numerous tasks is crucial.
Improved Visual Appeal
In addition to their organizational benefits, check boxes can significantly enhance the visual appeal of your Canva designs. By incorporating check boxes, you add a layer of professionalism and polish to your projects. Canva's vast library of design elements allows you to customize these check boxes to match your brand's aesthetic, ensuring a cohesive and attractive design. This visual consistency not only makes your content more engaging but also reinforces your brand identity.
Increased Interactivity
One of the standout features of using check boxes in Canva is the increased interactivity they bring to your designs. Interactive elements, such as check boxes, engage users by inviting them to participate actively with the content. This engagement is crucial for maintaining user interest and encouraging them to interact with your material. Whether it's a survey, a form, or a checklist, interactive elements can make your content more dynamic and engaging.
By incorporating check boxes into your Canva projects, you not only enhance the organizational structure and visual appeal but also create a more engaging experience for your audience. This trifecta of benefits makes check boxes an invaluable tool in your design arsenal, particularly when using Canva's free resources to maximize your project's potential. In the following sections, we'll explore the various methods to integrate check boxes into your Canva designs effectively.
Methods to Add Check Boxes in Canva
Creating a checklist or to-do list in Canva can be a straightforward process once you understand the various methods available to add check boxes. Whether you're looking to add check boxes in Canva online or learn how to make checklist in Canva , there are several techniques you can employ to enhance your design's functionality and appeal.
Using Canva's Elements
The simplest way to incorporate check boxes into your Canva designs is by utilizing Canva's built-in Elements. Start by navigating to the 'Elements' tab on the left-hand side of the Canva interface. Here, you can search for 'check box' or similar terms to find a variety of pre-designed check box graphics. Once you've selected a design that suits your needs, simply drag and drop it onto your canvas. You can resize, reposition, and duplicate these elements to fit your checklist requirements. This method is ideal for those who want a quick and easy solution without the need for extensive customization.
Creating Custom Check Boxes
If you prefer a more personalized approach, creating custom check boxes using Canva's basic shapes is a great option. Begin by selecting a shape, such as a square or circle, from the 'Elements' tab. You can then customize the color, border, and size to match your design theme. For added uniqueness, consider layering multiple shapes or adding text to your check box. This method allows for complete creative control, making it perfect for designers who want their checklists to align perfectly with their brand or project style.
Uploading External Icons
For those looking to integrate specific styles or icons not available in Canva, uploading external check box icons is a viable option. First, source or create your desired check box icon using graphic design software or download it from a reputable icon library. Then, upload the icon to Canva by clicking on the 'Uploads' tab and selecting 'Upload media'. Once uploaded, you can incorporate these icons into your design, adjusting their size and position as needed. This method is particularly useful for projects that require a distinct or branded look.
By exploring these methods, you can effectively add check boxes in Canva online and create checklists that are both functional and visually appealing. Whether you choose to use Canva's Elements, design custom shapes, or upload external icons, each technique offers unique advantages that can enhance your design projects. In the next section, we'll provide a step-by-step guide to adding check boxes using Canva's built-in elements, ensuring you have the tools needed to implement these techniques successfully.
Step-by-Step Guide to Adding Check Boxes Using Canva's Elements
If you’ve ever wondered how to seamlessly add check boxes in Canva to create an organized and visually appealing checklist, you’re in the right place. This step-by-step guide will walk you through using Canva’s built-in elements to enhance your design projects effortlessly.
Step 1: Accessing Canva's Elements
Begin by logging into your Canva account and opening a new design project. On the left-hand side of the interface, you’ll find the 'Elements' tab. Click on it to access Canva’s extensive library of design elements. This section is your gateway to a vast array of icons, shapes, and graphics that can be used to create your checklist.
Step 2: Searching for Check Box Designs
Once you’re in the 'Elements' section, use the search bar to find check box designs. Simply type in keywords like 'check box' or 'checklist' to browse through the available options. Canva offers a variety of styles, from simple squares to more decorative designs, ensuring you find something that fits your aesthetic.
Step 3: Adding Check Boxes to Your Design
After selecting a check box design that suits your project, click on it to add it to your canvas. You can drag and drop the element to position it exactly where you want it. To create multiple check boxes, simply copy and paste the element or use the duplicate function. This allows you to quickly set up a series of check boxes for your checklist.
Step 4: Customizing Your Check Boxes
Customization is key to making your checklist uniquely yours. Canva allows you to adjust the size, color, and orientation of your check boxes. Click on the element to reveal the customization options. You can resize the check box by dragging the corners, change its color to match your design theme, or rotate it for a creative twist.
Step 5: Finalizing Your Checklist
With your check boxes in place, it’s time to add text to complete your checklist. Use the 'Text' tool in Canva to insert your tasks or items next to each check box. Align the text neatly for a professional look. You can also enhance your checklist by adding headings, subheadings, or additional design elements from Canva’s library.
By following these steps, you can effectively add check boxes in Canva and create a checklist that is both functional and visually appealing. Whether you’re designing a personal to-do list or a professional project checklist, Canva’s built-in elements provide the tools you need to bring your ideas to life. In the next section, we’ll explore how to design custom check boxes to further personalize your Canva projects.
Designing Custom Check Boxes in Canva
Imagine having the freedom to tailor every element of your checklist to perfectly match your brand's aesthetic or personal style. This is possible when you create custom check boxes in Canva. By leveraging Canva's versatile tools, you can design check boxes that are not only functional but also visually engaging.
Step 1: Selecting the Right Shape
To start, navigate to the ‘Elements’ tab in Canva. Here, you’ll find a variety of shapes that can serve as the foundation for your custom check boxes. Squares and circles are popular choices, but feel free to experiment with other shapes like stars or hexagons for a unique twist. Once you've selected a shape, drag it onto your canvas.
Step 2: Customizing Shape Properties
Customization is where your creativity can truly shine. Click on the shape to access its properties. From here, you can adjust the color, size, and border to align with your design theme. For instance, you might choose a bold color to make your check boxes stand out or a subtle hue to maintain a minimalist look.
Step 3: Adding Text or Icons
To further personalize your check boxes, consider adding text or icons. Use Canva’s text tool to insert letters or numbers inside the shape, or explore the ‘Elements’ tab for icons that complement your design. This step is particularly useful if you want to add a layer of functionality, such as numbering tasks or incorporating symbols that indicate priority.
Step 4: Layering for Depth
Layering is a powerful technique to add depth to your designs. You can layer multiple shapes to create a 3D effect or overlap shapes to form intricate patterns. This approach not only enhances the visual appeal but also allows you to experiment with various textures and styles, making your checklist truly one-of-a-kind.
Step 5: Ensuring Alignment and Consistency
Once your custom check boxes are designed, it’s crucial to ensure they are aligned consistently throughout your document. Use Canva’s alignment tools to evenly space your check boxes and maintain a clean, professional look. Consistency in design not only improves readability but also reinforces your brand’s visual identity.
By following these steps, you can effectively create custom check boxes in Canva that enhance the functionality and aesthetic of your designs. Whether you're crafting a personal planner or a professional project checklist, these custom elements will ensure your work stands out. In the next section, we'll explore how to import external check box icons into Canva for even more design possibilities.
Importing External Check Box Icons into Canva
Have you ever found the perfect check box icon outside of Canva's library and wondered how to incorporate it into your design? Importing external check boxes in Canva can significantly enhance your project's uniqueness and style. Let's explore how to seamlessly bring these icons into your Canva workspace.
Step 1: Sourcing Your Icons
The first step in importing external icons is sourcing them from reputable icon libraries or graphic design software. Websites like Iconfinder or Flaticon offer a wide range of free and premium icons. When choosing icons, ensure they are in a compatible format, such as PNG or SVG, for smooth integration into Canva.
Step 2: Uploading Icons to Canva
Once you've selected your icons, it's time to upload them to Canva. Navigate to the 'Uploads' tab on the editor side panel. Click 'Upload files' and select your icons from your device. Canva supports various formats, but for optimal results, ensure your files are under 50MB and in a supported format like PNG or SVG. You can also drag and drop your files directly into the 'Uploads' tab, making the process quick and easy.
Step 3: Incorporating Icons into Your Design
After uploading, your icons will appear in the 'Uploads' section. To use them, simply click on an icon to add it to your canvas. You can resize, reposition, and layer these icons just like any other Canva element. This flexibility allows you to integrate the icons seamlessly into your design, ensuring they complement your overall aesthetic.
Step 4: Customizing Imported Icons
Customization doesn't stop at uploading. Canva allows you to further personalize your imported icons. Adjust the transparency, add filters, or overlay text to make the icons fit perfectly within your design. This step is crucial for maintaining consistency and ensuring the icons enhance rather than detract from your project's visual appeal.
By following these steps, you can efficiently import check boxes in Canva , expanding your creative possibilities and tailoring your designs to meet specific needs. Whether you're looking to add a unique touch to your checklist or incorporate branded elements, importing external icons offers a versatile solution. In the next section, we'll delve into tips for aligning and spacing check boxes in Canva to ensure a polished and professional finish.
Tips for Aligning and Spacing Check Boxes in Canva
Creating a neat and organized layout in Canva is essential for any design project, especially when incorporating check boxes. A well-aligned and evenly spaced design not only enhances visual appeal but also improves usability and readability. Let's explore some practical tips for using Canva's alignment tools to align check boxes in Canva and ensure consistent spacing check boxes in Canva .
Utilizing Canva's Alignment Tools
Canva's alignment tools are your best friend when it comes to creating a balanced layout. To align check boxes, start by selecting the elements you want to align. Use the 'Position' button on the top toolbar to access alignment options. You can align elements to the left, center, or right, and distribute them evenly along the vertical or horizontal axis. This feature is particularly useful for ensuring that your check boxes line up perfectly with text or other design elements, creating a professional look with minimal effort.
Grouping for Cohesive Structuring
Grouping is a powerful tool for maintaining a cohesive structure in your designs. When you group check boxes with their corresponding text or icons, you can move and resize them as a single unit. To group elements, select them, right-click, and choose 'Group.' This ensures that your check boxes and text remain aligned and evenly spaced, even when adjusting the layout. Grouping is especially beneficial for complex designs, where maintaining consistent spacing is crucial.
Leveraging Spacing Guides and Snapping
Spacing guides and snapping features in Canva help maintain uniform spacing between elements. As you move an element, blue lines will appear, indicating the distances between objects. These guides ensure that your check boxes are evenly spaced, preventing any accidental overlaps or uneven gaps. Additionally, enable the snapping feature to have your elements automatically align with gridlines, making it easier to achieve symmetry and balance in your design.
By effectively using these tools, you can create a clean and organized layout that enhances the functionality and visual appeal of your Canva projects. Whether you're designing a checklist, a form, or any other document, aligning and spacing your check boxes correctly will contribute to a polished and professional result. In the next section, we'll explore how to enhance the interactivity of your check boxes, taking your designs to the next level.
Enhancing Interactivity of Check Boxes in Canva Designs
Imagine transforming your static checklists into dynamic, interactive experiences for your audience. Sounds complex? Not at all. With Canva, you can easily make your check boxes interactive, adding a layer of engagement that captivates users. Let's explore how to create interactive check boxes in Canva by linking them to other pages, animating, and incorporating hover effects.
Linking Check Boxes to Other Pages or URLs
One effective way to enhance interactivity is by linking check boxes to other pages or external URLs. This feature is particularly useful for creating comprehensive guides or multi-page documents. To add a link, select your check box, click on the 'Link' icon in the toolbar, and enter the URL or page number. This transforms your checklist into a navigational tool, guiding users through your content seamlessly.
Animating Check Boxes for Visual Appeal
Animation is a powerful tool to draw attention and make your designs more engaging. Canva allows you to animate check boxes in Canva with ease. To animate, select the check box, click on 'Animate' in the toolbar, and choose from a variety of animation styles. You can apply effects like 'Fade in' or 'Pop' to make the check boxes appear dynamically as users interact with your design. This not only enhances visual interest but also provides feedback, indicating that an action has been completed.
Incorporating Hover Effects
Hover effects provide a subtle yet effective way to enhance user interaction. While Canva's hover features are more limited compared to dedicated web design tools, you can simulate hover effects by creating duplicate check boxes with different styles and layering them. For instance, you might have a check box that changes color when hovered over, signaling interactivity. This can be achieved by grouping the original and hover-style check boxes, then using Canva's animation sequence to toggle visibility.
By integrating these techniques, you can significantly enhance the interactivity of your check boxes, making your Canva designs not only more functional but also more engaging. Whether you're building a comprehensive checklist or an interactive form, these methods will help you create a dynamic user experience. Next, we'll summarize key takeaways and introduce a practical tool to further explore Canva's capabilities.
Conclusion
As we've explored throughout this guide, the ability to add check boxes in Canva offers a myriad of benefits, from enhancing organization to boosting interactivity in your designs. By incorporating check boxes, you can transform static content into dynamic, engaging experiences that not only look professional but also serve practical purposes. Whether you are crafting a simple to-do list or a comprehensive project checklist, Canva's user-friendly tools make the process straightforward and enjoyable.
We began by discussing the utility of check boxes in organizing tasks and engaging users. With Canva's extensive library of elements, templates, and customization options, you can tailor your checklists to fit any aesthetic or functional need. From using Canva's built-in elements to designing custom check boxes and importing external icons, the methods available are both diverse and adaptable, catering to every designer's unique style and requirements.
Furthermore, aligning and spacing check boxes properly ensures a polished look, while enhancing interactivity through links, animations, and hover effects elevates your designs to a new level of engagement. These features are crucial for creating content that not only captures attention but also facilitates user interaction and satisfaction.
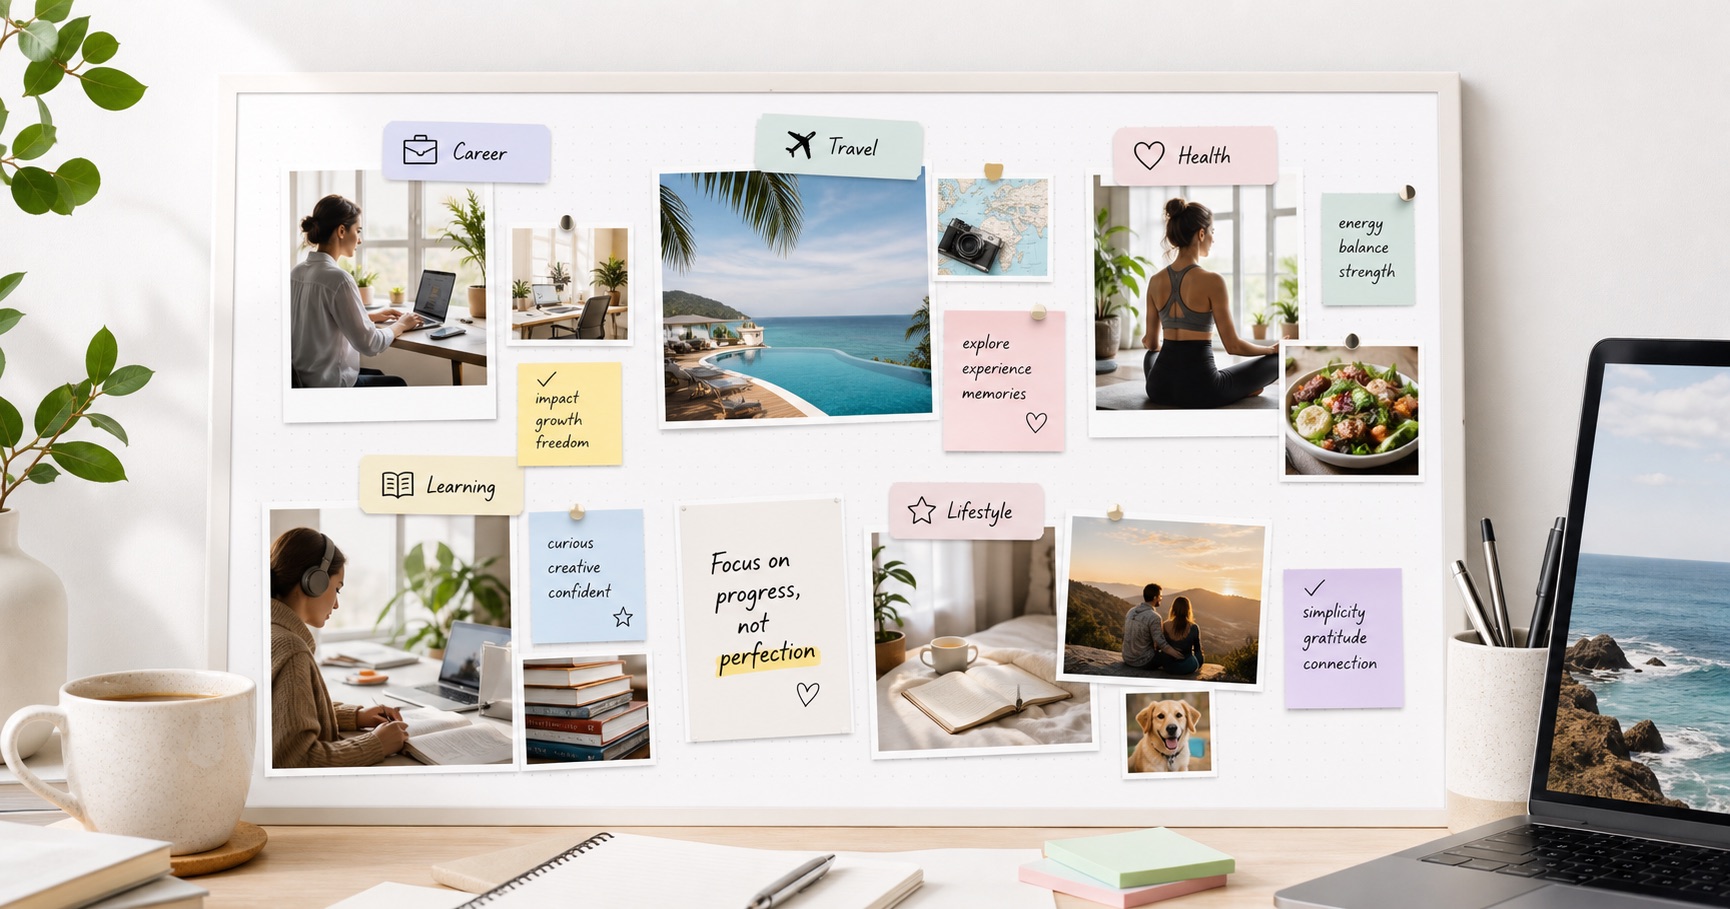
To further enhance your Canva projects, consider utilizing Affine's Coquette Aesthetic Vision Board template. This versatile tool is perfect for those looking to integrate check boxes seamlessly into their designs. The template offers a visually appealing and highly customizable framework that aligns personal and professional goals with aesthetic elements. Available on multiple platforms, including Canva, it allows for easy editing and personalization. With features like built-in aesthetic graphics and an extensive icon library, this template makes goal-setting a creative and motivating process. Learn more about how it can complement your Canva projects by visiting the Affine Coquette Aesthetic Vision Board .
In conclusion, the integration of check boxes in Canva designs is not just about adding functionality; it's about enhancing the overall quality and impact of your projects. With the right tools and techniques, you can create organized, interactive, and visually stunning content that resonates with your audience. Explore Canva's features and the Coquette Aesthetic Vision Board template to unlock new creative possibilities and take your designs to the next level.
Frequently Asked Questions
1. How do I add fillable boxes in Canva?
To add fillable boxes in Canva, use the Typeform app integration. Create a form in Typeform, link it to Canva, and embed it in your design for interactive use.
2. How to insert boxes in Canva?
In Canva, open your project, select 'Elements', and search for 'box'. Choose your preferred design and drag it onto your canvas to customize.
3. Can I use custom check boxes in Canva?
Yes, you can create custom check boxes by selecting shapes from the 'Elements' tab, customizing their properties, and adding text or icons for personalization.
4. How can I make check boxes interactive in Canva?
To make check boxes interactive, use Canva's linking feature to connect them to pages or URLs, and apply animations for dynamic effects.
5. What are the benefits of using check boxes in Canva designs?
Check boxes in Canva enhance organization, improve visual appeal, and increase interactivity, making designs more engaging and functional.