
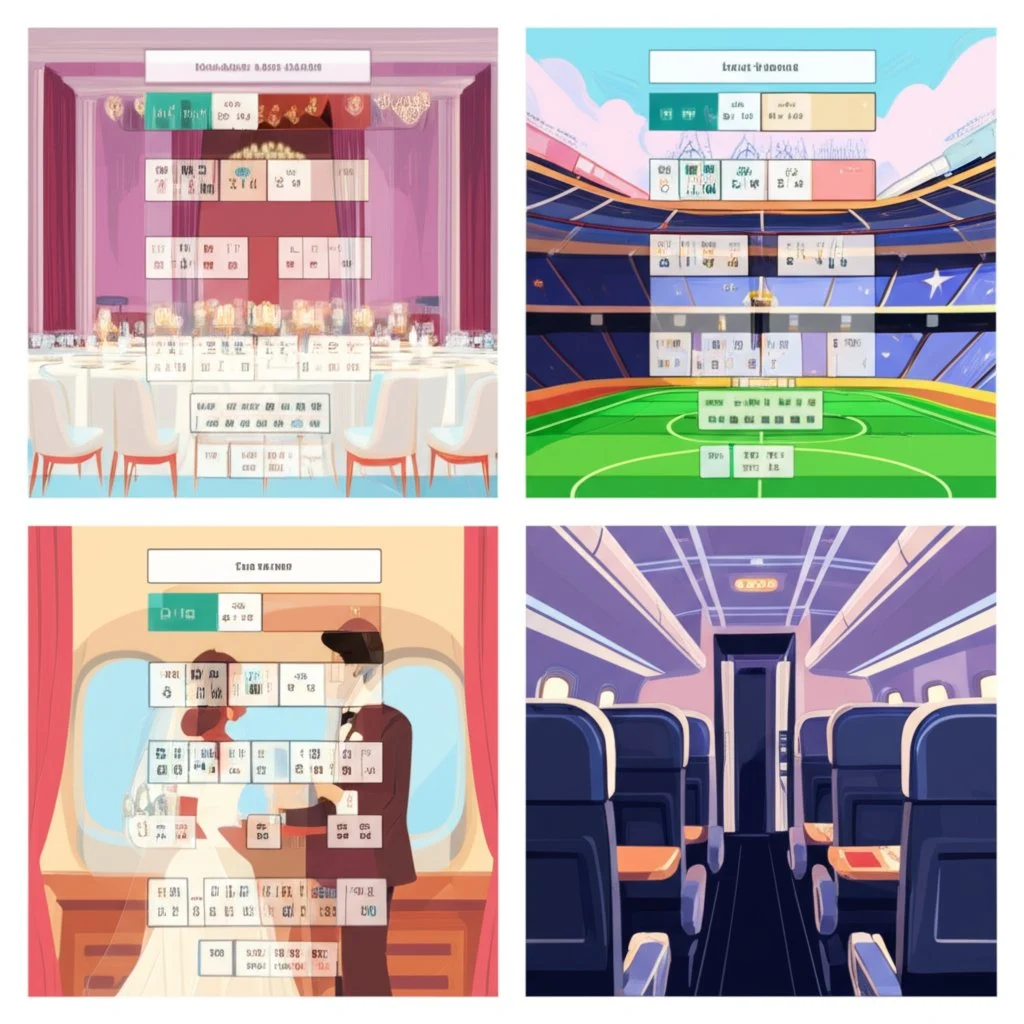
Seating Charts 2026: Read Any Venue Like a Pro
Updated May 2026 with the 2026 seat-type quick reference, IAVM industry context, and 7-term seating glossary.
Seat Type Quick Reference
| Seat Type | Best For | Price Tier | Sightline |
|---|---|---|---|
| Front Row | Concerts, live theater | Premium | Closest, head-up |
| Loge / Box | Sports, opera | Premium / VIP | Elevated, semi-private |
| Mezzanine | Broadway, theater | Mid | Slight overlook, full stage |
| Club Level | Stadiums, arenas | Premium | Mid-height, indoor amenities |
| General Admission | Festivals, standing concerts | Lowest | Variable, first-come |
| ADA / Accessible | Any wheelchair-user | Standard | Step-free, level sightline |
Why seat selection deserves more thought than "pick the cheapest available": the International Association of Venue Managers (IAVM) — the global trade body for arena, stadium, theater, and amphitheater operators — publishes design standards that shape sightline geometry, ADA placement, and amenity routing in nearly every major U.S. venue. Reading a chart with those patterns in mind (rather than just chasing a section number) is the difference between a memorable night and a partially-obstructed view.
Introduction to Seating Charts
Ever walked into a bustling event and wondered, “Where do I sit?” or felt relief when your name appeared on a neatly organized seating chart at a wedding or conference? Sounds familiar? That’s the quiet power of a well-crafted seating chart in action. Whether you’re attending a concert, a sports game, a classroom session, or boarding a flight, these charts are everywhere—shaping experiences, smoothing logistics, and making large gatherings feel a bit more personal.
What exactly is a seating chart? At its core, a seating chart is a visual plan or diagram that shows where people should sit in a given space. It can be as simple as a hand-drawn map for a family dinner or as sophisticated as a digital, interactive seating chart for a stadium event. The goal? To eliminate confusion, ensure everyone has a place, and often, to enhance the experience by considering factors like relationships, accessibility, and preferences (Wikipedia).
Imagine these scenarios:
-
Concerts and Sporting Events: Attendees use a seating chart to find their section, row, and seat, ensuring smooth entry and helping them get the best view.
-
Weddings and Banquets: A wedding seating chart template helps guests find their assigned table, fostering conversation among friends and family while respecting etiquette and special needs.
-
Classrooms: Teachers use seating chart templates to manage participation, encourage collaboration, or accommodate learning needs.
-
Transportation: Airlines provide seating charts to help passengers select seats based on class, location, or amenities.
-
Corporate Meetings & Conferences: Organizers use charts to assign seats by department, rank, or project teams, streamlining communication and workflow.
But why are they so essential? Here are just a few reasons:
-
Improved Experience: Attendees know exactly where to go, reducing stress and confusion.
-
Efficient Logistics: Planners can manage crowd flow, maximize space, and ensure compliance with safety or protocol requirements.
-
Personalization: With a seating chart template, you can group guests by interests or relationships, making events more enjoyable and memorable.
-
Accessibility: Special needs can be accommodated, such as wheelchair access or proximity to exits.
-
Data & Planning: For recurring events, seating charts provide a record for future improvements or troubleshooting.
In this guide, you’ll discover how to interpret, create, and leverage seating charts for any occasion. We’ll cover the basics of reading different layouts, offer tips for choosing the best seat, and share actionable advice for planners and attendees alike. Whether you’re searching for the perfect seating chart template or looking to master the art of event organization, you’ll find practical insights to make every event run smoother—from the classroom to the concert hall, from weddings to world-class sports arenas.
Ready to take the stress out of seating? Let’s dive into the fundamentals and unlock the secrets of effective seating chart design and use.
Understanding Seating Chart Fundamentals
When you glance at a seating chart, does it look like a maze of numbers and lines? Sounds complex, but once you understand the basics, interpreting any seating chart layout becomes second nature. Whether you’re organizing a classroom, planning a wedding, or buying tickets for a big game, knowing the core elements and chart types will save you time and headaches.
Key Seating Chart Terminology Explained
Before diving into different layouts, let’s break down the most common terms you’ll see on a seating chart:
-
Section: A designated area within the venue, often labeled with letters or numbers (e.g., Section A, Section 101).
-
Row: A horizontal line of seats within a section, typically labeled alphabetically (A, B, C) or numerically (1, 2, 3).
-
Seat Number: The unique identifier for each seat in a row, helping you pinpoint your exact spot.
-
Sightline: The direct line of sight from your seat to the focal point (stage, field, or screen). Good sightlines mean you won’t miss any action.
-
Obstruction: Anything that blocks your view, like pillars, railings, or equipment. Some charts mark these seats as "restricted view." (Auditoria Services)
-
Aisle: The walkway between seat blocks, providing access to your row and improving crowd flow.
-
Box/Loge: Private or semi-private areas, often elevated, offering exclusive seating for small groups.
Common Types of Seating Chart Layouts
Not all seating charts are created equal. The layout you encounter depends on the event type, venue, and goals. Here are the most popular seating chart layouts and where you’ll typically find them:
-
Arena Layout: Seats surround a central stage or court on all sides. Used for concerts, basketball, and boxing matches.
-
Stadium Layout: Large-scale, tiered seating encircling a field or pitch. Common for football, baseball, and soccer games.
-
Banquet Layout: Round tables spread throughout the room, seating 8–10 guests each. Ideal for weddings, galas, and corporate dinners.
-
Classroom Layout: Rows of tables and chairs facing a single direction, designed to focus attention on a presenter or board. Often used in schools, workshops, and training sessions. (Social Tables)
Quick Comparison of Seating Chart Layouts
| Layout Type | Best For | Key Features | Potential Drawbacks |
|---|---|---|---|
| Arena | Sports, concerts, large performances | 360-degree seating, central focus, high energy | Some seats may have side/rear views |
| Stadium | Outdoor/indoor sports, large-scale events | Tiers, sections, large capacity, elevated views | Distant seats, possible obstructions |
| Banquet | Weddings, banquets, social events | Round tables, encourages conversation, flexible grouping | Some guests may have backs to stage/speaker |
| Classroom | Education, training, workshops | Rows of tables/chairs, all face the front, easy note-taking | Less interaction between attendees |
Choosing the Right Layout: Practical Scenarios
-
For a concert or sports event: An arena or stadium seating chart layout helps you pick the perfect section for the best view and atmosphere.
-
For a wedding or gala: A banquet layout lets you use a seating chart template to group guests by relationship or preference, making the event more enjoyable.
-
For a classroom or seminar: A seating chart template classroom design ensures every student can see the instructor and participate fully.
Understanding these fundamentals will make reading any seating chart a breeze. Up next, we’ll dive into how these principles apply to massive stadiums and ballparks, helping you choose the best seat for your next big event.
Seating at Stadiums and Ballparks Instructions
When you step into a massive stadium or iconic ballpark, the sheer scale can be overwhelming. Where’s the best place to sit? How do you read a stadium seating chart to get the most out of your experience? Let’s break down how to interpret these charts, what each section offers, and how to make the smartest choice for your next big game or concert.
Breaking Down the Stadium Seating Chart: Key Sections and What They Mean
Most stadiums and ballparks share a similar layout, but each has its quirks. Here’s a quick rundown of the most common sections you’ll see on a stadium seating chart:
-
Lower Level (Infield/Baseline): Closest to the action, often running along the first and third baselines or behind home plate in baseball stadiums. In football or soccer stadiums, these are the seats along the sidelines.
-
Outfield/End Zone: Located behind the outfield fence in baseball or the end zones in football, these offer unique perspectives and, sometimes, a chance to catch a home run or touchdown ball.
-
Grandstand/Upper Deck: Elevated sections that provide a panoramic view of the field. These are often the most affordable seats and offer a bird’s-eye perspective of the entire venue.
-
Club Level: Mid-tier sections with upgraded amenities, such as cushioned seating, exclusive lounges, and premium concessions.
-
Suites & Luxury Boxes: Private, enclosed areas for groups. These come with top-tier amenities, privacy, and personalized service.
-
Accessible Seating: Designed for fans with mobility needs, usually located at various levels with clear sightlines and easy access to entrances and amenities.
Pros and Cons of Popular Stadium Sections
Every section has its own trade-offs. Here’s a quick guide to help you decide where to sit, based on your priorities:
| Section | Pros | Cons |
|---|---|---|
| Lower Level (Infield/Baseline) | * Up-close view of the action * Best for die-hard fans * Easy access to amenities | * Higher ticket prices * Risk of foul balls (in baseball) * Can be noisy or crowded |
| Outfield/End Zone | * Chance to catch home runs or touchdowns * Unique perspective of the game * Often more affordable | * Farther from main action * Views can be obstructed |
| Grandstand/Upper Deck | * Panoramic views * Budget-friendly * Less crowded | * Distant from the field * Steep stairs * Possible sightline obstructions |
| Club Level | * Upscale amenities * Comfortable seating * Exclusive access | * Premium pricing * Limited availability |
| Suites & Luxury Boxes | * Ultimate privacy and comfort * Personalized service * Perfect for groups/parties | * Most expensive option * Less of the crowd energy |
Key Factors to Consider: Sun, Shade, Amenities, and Sightlines
-
Sun vs. Shade: For day games, check which side of the stadium gets shade. For example, at Dodger Stadium, seats along the third baseline offer more shade during afternoon games (SeatGeek).
-
Amenities: Club levels and suites often provide better food, cushier seats, and climate control. If comfort is your priority, these are worth considering.
-
Sightlines: Lower-level seats along the baselines or behind home plate usually offer the clearest views. Upper decks can provide a great overview, but sometimes come with obstructions or steep angles.
-
Atmosphere: Want to feel the energy? The lower bowl and grandstand sections are often where the most passionate fans sit.
Iconic Ballparks: Wrigley Field, Fenway Park, Yankee Stadium, and More
Every ballpark has its own personality—and its own quirks on the seating chart. Let’s look at a few famous examples:
-
Wrigley Field Seating Chart: Known for its historic charm and unique rooftop seating across the street, Wrigley offers a range of experiences. Lower-level seats behind home plate are prized, but the outfield bleachers and rooftop areas provide a one-of-a-kind perspective and a taste of Chicago’s skyline. The new “The Yard” section above center field added a premium group option for the 2025 season.
-
Fenway Park: The Green Monster seats atop the left-field wall are legendary, offering a chance to catch home run balls and a truly unique view. Grandstand seats along the first and third base offer traditional views, but be aware of support poles that can obstruct sightlines.
-
Yankee Stadium: Look for seats behind home plate or in the Legends Suite for a luxury experience, or opt for the bleachers for a more budget-friendly, energetic crowd.
-
Dodger Stadium: Dugout Club seats are some of the best, with shaded options behind home plate. Outfield pavilions provide a lively atmosphere for home run chases.
Actionable Tips for Choosing the Best Stadium Seat
-
Use the official stadium seating chart to check for potential obstructions, especially in older venues.
-
If you’re sensitive to sun or heat, research which sections are shaded for the time of your event.
-
For families, consider sections with easy access to restrooms and concessions.
-
Want the best atmosphere? Look for sections where local fans gather or the grandstand area.
-
Check out interactive tools or “view-from-seat” features on ticketing platforms to preview your perspective before you buy.
Understanding how to read and use a stadium seating chart helps you maximize your event experience—whether you’re after the thrill of the lower bowl, the panoramic views of the upper deck, or the exclusive perks of club-level seating. Next, we’ll explore how these concepts shift when you move indoors to arenas for sports and concerts, where stage setups and sightlines take center stage.
Choosing Seats in Arenas for Sports and Concerts
Ever stared at an arena seating chart and wondered, “How do I pick the perfect seat for my event?” Whether you’re catching a basketball game, cheering at a hockey match, or singing along at a sold-out concert, the layout of an arena can make all the difference in your experience. Let’s break down how arena seating charts work, how they change for sports versus concerts, and what you should look for when choosing your seat.
How Arena Seating Charts Change for Sports and Concerts?
Unlike stadiums, arenas are indoor, multi-purpose venues designed to transform quickly between sports, concerts, and special events. This flexibility means the seating chart you see for a basketball game may look very different for a concert—even in the same building. Here’s why:
-
Sports Events: The court or rink is always in the center. Seats are arranged in a bowl shape around the action, maximizing sightlines from every angle. Lower bowl seats get you close to the floor, while upper levels offer a panoramic view.
-
Concerts: The stage can be set up in multiple ways—at one end (end-stage), in the center (in-the-round), or even with special catwalks and B-stages. This changes which seats have the best views and which might be partially obstructed.
Popular Arena Layouts: Real-World Examples
Let’s look at how some iconic arenas handle their seating chart layouts:
-
Madison Square Garden (MSG): Known for its tiered bowl design, MSG offers floor seats for concerts and courtside options for Knicks games. The MSG seating chart changes for each event—concert setups may block certain sections behind the stage, while sports layouts keep all-around views open.
-
Crypto.com Arena: Formerly Staples Center, this venue adapts its seating for basketball, hockey, and concerts. For concerts, the stage is usually set at one end, meaning seats behind the stage might be unavailable or sold at a discount. The arena provides an interactive 3D seating chart so you can preview your view for any event (Crypto.com Arena Guide).
-
Other Arenas: Whether it’s TD Garden in Boston or United Center in Chicago, most major arenas follow similar patterns—lower bowl, upper bowl, and premium suites or club seating, with layouts shifting for concerts versus sports.
Stage Setups: End-Stage, In-the-Round, and More
The type of stage setup for a concert has a huge impact on your experience:
-
End-Stage: Most common for concerts. The stage is at one end, so seats directly facing the stage (lower and upper bowl) offer the best views. Side seats can be great for proximity but may have angled or partial views. Seats behind the stage are often not sold or are marked as "limited view."
-
In-the-Round: The stage is placed at the center of the arena. All sections are used, and performers move around, giving everyone a chance at a great view. However, you might spend some time looking at the artist’s back, depending on the performance style.
-
Special Configurations: Some shows use runways, B-stages, or custom layouts, which can create unique sightlines or obstructions. Always check the event’s official seating chart for these details.
Comparing Arena Seating for Sports vs. Concerts
| Feature | Sports Event | Concert |
|---|---|---|
| Seating Focus | 360-degree view of court/rink | Best views usually in front of the stage |
| Floor Seats | Courtside or rinkside, close to action | Floor seats can be standing or seated, proximity to stage varies |
| Obstructions | Minimal; all seats designed for clear views | Possible behind stage or extreme side angles |
| Acoustics | N/A | Acoustics best toward the center; echo can affect upper levels |
| Premium Options | Suites, club seats, lounge access | VIP seats, meet-and-greet, exclusive floor access |
What to Consider: Floor Seats, Bowl Sections, and Obstructions
-
Floor Seats: For concerts, these put you closest to the stage but may be flat, so your view depends on the crowd. For sports, courtside seats are unmatched for proximity.
-
Lower Bowl: Offers a balance of view and comfort for both concerts and games. These seats are often the most in-demand.
-
Upper Bowl: More affordable, with a bird’s-eye view. Great for seeing formations in sports or enjoying the full production at a concert, but you’ll be farther from the action.
-
Potential Obstructions: For concerts, check for speakers, lighting rigs, or stage extensions that might block your view. Arenas try to minimize these, but it’s worth previewing your seat online if possible.
Tips for Navigating Arena Seating Charts
-
Always use the official or interactive arena seating chart to preview your view for your specific event.
-
For concerts, verify if your section is behind the stage or labeled as “limited view.”
-
If you value acoustics, aim for seats near the soundboard—these are often where the audio mix is optimized.
-
For sports, the lower bowl sideline or center ice/court seats give the most balanced perspective.
-
Consider amenities like club access, food options, and restrooms, especially for longer events.
Understanding an arena seating chart helps you choose seats that fit your preferences—whether you’re after the energy of the floor, the comfort of club sections, or the panoramic views up top. Next, we’ll explore how seating charts adapt for unique venues and travel, where layouts and considerations can be even more specialized.
Seating Insights for Unique Venues and Travel
Ever tried to find the perfect seat at an outdoor amphitheater or wondered which spot on a plane will make your journey more comfortable? Not all seating charts are created equal—especially when you step outside traditional arenas and stadiums. Let’s explore how to interpret the hollywood bowl seating chart , understand the immersive layout of the Sphere in Las Vegas, and navigate the american airlines seating chart for a better travel experience.
Hollywood Bowl Seating Chart: Outdoor Amphitheater Essentials
Picture yourself under the stars, surrounded by music at the iconic Hollywood Bowl. Sounds magical, but picking the right seat can make or break your night. The Hollywood Bowl seating chart is unique—think terraced rows, open-air design, and a range of experiences from luxury to budget-friendly.
-
Premium Garden Seats: Located close to the stage, these offer upscale comfort and chairback seating. If you’re after an unforgettable experience, this is the place to be.
-
Pool B, C, and D Sections: Consistently reviewed as top picks, these sections combine excellent views with proximity to the performers without the highest price tag.
-
Upper Sections: While further from the stage, these seats provide sweeping views of the entire venue and are more affordable.
Practical tips for interpreting the Hollywood Bowl seating chart:
-
Check for seat type—some areas have benches, others feature individual chairs.
-
Consider accessibility: The Bowl offers designated accessible seating throughout the venue.
-
Factor in acoustics and sightlines—sound travels well, but closer seats offer a more immersive experience.
-
Read recent seat reviews to see which sections are praised for comfort and view (RateYourSeats).
The Sphere: Immersive Venue Seating Like No Other
Imagine being inside a giant LED dome where the screen wraps around you and even your seat vibrates with the action. The Sphere in Las Vegas redefines venue seating with its technology-driven design. Here’s how to make sense of its unique layout:
-
Section 306: Widely regarded as the best view, offering a perspective like looking through a director’s lens. Surrounding sections (305, 307) are also excellent.
-
200 & 300 Levels: Unobstructed, floor-to-ceiling screen views. Perfect for those seeking both immersion and comfort.
-
400 Level: The highest and steepest, but offers panoramic views and the most affordable tickets. Not ideal if you’re uncomfortable with heights.
-
Haptic Seats: Over half the seats feature vibration technology, creating a multi-sensory experience.
Tips for navigating the Sphere’s seating chart:
-
Use the official seating map to compare levels and sightlines before purchasing.
-
If you’re prone to vertigo, stick to lower levels.
-
Consider haptic seats for a truly immersive show.
American Airlines Seating Chart: Travel Comfort and Convenience
When flying, your seat choice can mean the difference between a restful journey and a restless one. The american airlines seating chart varies by aircraft and class, but a few universal guidelines can help you choose wisely:
-
First and Business Class: Expect lie-flat or recliner seats, added privacy, and premium service—ideal for long-haul comfort.
-
Premium Economy: More legroom and wider seats than standard economy—great for taller travelers or those wanting extra space.
-
Economy: Most affordable, but less spacious. Exit rows and bulkhead seats offer extra legroom.
How to interpret the American Airlines seating chart for your needs:
-
Book early to secure preferred seats, especially extra legroom or window/aisle spots.
-
Check seat maps for proximity to restrooms, galleys, and exits—important for convenience and quiet.
-
Use frequent flyer miles for seat upgrades if available.
-
Review the seat map before finalizing your booking to avoid less desirable locations (like limited recline or near restrooms).
Mastering seating charts for unique venues and travel isn’t just about picking a spot—it’s about maximizing comfort, accessibility, and the overall experience. Next, we’ll explore how these principles help you design the perfect seating plan for a wedding or special event, where etiquette and guest needs matter just as much as logistics.
Planning Your Wedding Seating Arrangements
When you picture your big day, do you imagine everyone mingling happily at their tables—or do you worry about awkward silences and mismatched groups? Crafting a thoughtful wedding seating chart can make all the difference, transforming your reception into a seamless, joyful celebration. But where do you start when the guest list is long and the relationships are complex? Let’s break the process down into clear, manageable steps, with expert-backed etiquette and digital solutions to keep everything stress-free.
Step 1: Gather and Organize Your Guest Data
Before you even think about who sits where, you’ll need a complete, confirmed guest list. Sounds obvious, but without it, arranging seats is nearly impossible (Brides). Once you have your RSVPs, group guests by how you know them—family, college friends, coworkers, neighbors, and so on. This makes it easier to spot natural groupings and identify potential seating conflicts or opportunities for connection. For example, you might notice several guests with young children or a few out-of-towners who’d appreciate meeting others in the same boat.
-
Pro tip: Use a spreadsheet to track names, relationships, meal choices, and special needs. Separate first and last names into different columns for easy sorting later.
-
Don’t forget to include yourselves (the couple) on the list—this is a surprisingly common oversight!
Step 2: Understand Wedding Seating Chart Etiquette
Etiquette isn’t about rigid rules—it’s about helping guests feel comfortable and included. Here are the essentials:
-
Head Table or Sweetheart Table? Decide whether you want a head table with your wedding party (and their dates), or a sweetheart table for just the two of you. Either choice is fine—pick what fits your style and needs (The Knot).
-
Family Tables: Traditionally, parents, grandparents, and close family sit nearby, but arrangements can be flexible—especially with divorced parents or blended families. Consider separate tables of equal prominence or seating them at opposite ends of a long table if needed.
-
Group by Connection: Seat friends, colleagues, or relatives with people they know or have something in common with. Avoid isolating single guests or creating a “singles” table, which can feel awkward.
-
Kids’ Table: If you have several children attending, a dedicated kids’ table with activities is a great idea—but keep it close to their parents’ tables for comfort.
-
Special Needs & Accessibility: Ensure guests with mobility issues have easy access and enough space. Place older guests away from loudspeakers or the dance floor, and ensure dietary needs are noted for meal service.
Step 3: Choose Table Shapes and Layout
The layout of your venue and the shape of your tables will influence your seating plan. Common options include round, rectangular, oval, or square tables. Round tables foster conversation and offer more legroom, while rectangular tables maximize seating in tighter spaces. Always request a floor plan from your venue and experiment with different arrangements before finalizing your chart.
| Table Shape | Best For | Considerations |
|---|---|---|
| Round | Encouraging conversation, more legroom | May require more floor space |
| Rectangular | Large guest counts, maximizing space | Some guests may be farther from the couple |
| Square | Modern look, small groupings | Not ideal for very large parties |
| Oval | Elegant, unique venues | Less common, may require custom linens |
Step 4: Create and Refine Your Wedding Seating Chart
Ready to start assigning seats? Here’s where a wedding seating chart template or digital tool can save you major headaches. Traditional methods—index cards, sticky notes, or poster boards—work for some, but digital tools offer drag-and-drop simplicity, easy rearrangement, and sharing capabilities. Online table makers let you visualize your entire floor plan, adjust groups on the fly, and ensure every guest is accounted for. Don’t forget to check your work: the number of seats should match your final RSVP count!
-
Arrange guests alphabetically or by table on your printed chart for easy reference on the big day.
-
Include table numbers and guest names clearly—especially if you’re using escort cards or a seating chart display at the entrance.
-
Share your digital chart with your planner, caterer, or venue for seamless coordination.
Step 5: Leverage Free Online Table Maker Tools
Looking for the easiest way to manage your guest list and assignments? The internet is full of free wedding seating chart template options and digital planners. These tools allow you to:
-
Import guest lists from spreadsheets
-
Drag and drop guests between tables
-
Visualize table shapes and venue layouts
-
Share or print professional charts for your vendors
To save time and avoid decision fatigue, check out the AFFiNE blog’s curated list of top free online table maker tools. This guide reviews the best platforms for organizing guest data, customizing layouts, and collaborating with your partner or planner—helping you move from spreadsheet chaos to a polished, ready-to-print seating chart in no time.
By following these steps and embracing the right digital resources, you’ll transform the daunting task of wedding seating arrangements into a smooth, even enjoyable part of your planning journey. Next, we’ll look at essential tools for creating seating charts for any event—so you can streamline the process whether you’re planning a wedding, corporate dinner, or school function.
Essential Tools for Creating Seating Charts
Ever tried organizing a big event and found yourself buried in sticky notes or endless spreadsheets? If so, you’re not alone. When you need to map out who sits where—whether for a wedding, classroom, or corporate dinner—the right tool can turn chaos into clarity. But with so many options out there, how do you choose the best seating chart maker for your needs?
Manual Methods and Spreadsheets: The Classic Approach
Before the digital age, most planners relied on pen-and-paper charts or basic spreadsheet software. Imagine shuffling index cards or rearranging names in Excel—sounds familiar? These methods are:
-
Flexible —You can customize layouts and groupings as you wish.
-
Low-cost —No software purchases required.
But you’ll notice some drawbacks quickly:
-
Manual updates are time-consuming and prone to error.
-
Visualizing complex layouts or last-minute changes can become overwhelming.
-
Collaboration is difficult if multiple people need access.
Spreadsheets work in a pinch, but as guest lists grow or layouts get complicated, you may want to explore dedicated tools designed for this very purpose.
Dedicated Seating Chart Makers: Features That Make a Difference
Modern seating chart maker software streamlines the entire process. Imagine dragging and dropping guests into place, instantly seeing your layout, and sharing updates in real time. Here’s what you can expect from today’s top solutions (EdrawSoft):
-
Drag-and-Drop Design: Easily rearrange tables and seats with a click.
-
Guest Management: Import lists, track RSVPs, assign guests to specific seats or tables.
-
Customizable Templates: Start with ready-made layouts for weddings, classrooms, or corporate events.
-
Collaboration: Share your chart with co-planners, caterers, or teachers for real-time feedback.
-
Reporting & Printing: Export your chart as a PDF, spreadsheet, or image for sharing or on-site use.
-
Integration: Sync with ticketing, registration, or guest list apps for seamless updates.
Comparing Popular Seating Chart Maker Tools
| Tool | Best For | Key Features | Pricing |
|---|---|---|---|
| EdrawMax | All-purpose events, visual layouts | Unlimited drawing tools, free templates, cross-platform | Free & Paid |
| Canva | Quick visual charts, online sharing | Custom templates, drag-and-drop, easy exports | Free & Paid |
| Mega Seating Plan | Classroom seating | Simple interface, tailored for teachers | Free & Paid |
| RSVPify & Social Tables | Weddings, large events | End-to-end event planning, guest list, seating, invites | Paid |
Each seating chart maker has its own strengths. For example, EdrawMax stands out for its cross-platform support and abundance of free templates, while Canva is great for quick, visually appealing charts. Mega Seating Plan is ideal for teachers, and RSVPify or Social Tables offer robust solutions for event pros.
Free vs. Paid Options: Which Should You Choose?
Pros of Free Seating Chart Makers
-
Accessible to anyone—great for small events or tight budgets.
-
Many offer drag-and-drop and printable charts.
-
No long-term commitment or learning curve.
Cons of Free Tools
-
Limited features—advanced guest management or integrations may be missing.
-
Fewer customization options or templates.
-
May include watermarks or ads on exports.
Pros of Paid Solutions
-
Comprehensive features: automation, reporting, and integrations.
-
Priority support and regular updates.
-
Ideal for large-scale or recurring events.
Cons of Paid Tools
-
Subscription or one-time costs can add up for infrequent users.
-
Some platforms may require training or onboarding.
Your Shortcut: Curated Lists of Free Online Table Makers
Still not sure which free seating chart maker to try? The AFFiNE blog’s curated guide to the best free online table maker tools is a must-read. It reviews top options for drag-and-drop design, guest management, and collaboration—including AFFiNE’s own open-source, all-in-one table solution that supports offline work, markdown, and project planning layouts. This resource saves you hours of research and helps you find the perfect fit for your event, whether you’re planning a wedding, classroom, or team meeting.
Choosing the right seating chart maker isn’t just about convenience—it’s about empowering you to focus on what matters most: creating memorable experiences and smooth-running events. Next, let’s break down how to read and interpret any seating chart with confidence, so you can navigate any venue or event like a pro.
How to Read Any Venue Seating Map Effectively?
Ever stared at a seating chart print and wondered, “Where do I even start?” You’re not alone! Whether you’re heading to a concert, a sports game, or a special event, deciphering a seating chart template can feel overwhelming at first glance. But once you know what to look for—and how to use those symbols, colors, and labels—you’ll be able to find your seat, spot the best amenities, and avoid any surprises. Let’s break down the process so you can navigate any venue map with confidence.
Step 1: Understand the Core Elements of a Seating Chart
-
Sections: Most charts divide the venue into labeled areas, such as Section A, 101, or Balcony. These are usually marked in bold or with color blocks.
-
Rows: Within each section, rows are typically labeled alphabetically (A, B, C) or numerically (1, 2, 3), running from front to back.
-
Seat Numbers: Each seat in a row is numbered, helping you pinpoint your spot. Numbers usually increase from one side of the section to the other.
-
Symbols: Icons represent different features—such as wheelchair accessibility, restrooms, exits, or VIP areas. For example, a wheelchair symbol indicates accessible seating, while a star or crown might mark premium or VIP seats (EdrawMax).
-
Color Codes: Many charts use colors to indicate price tiers or seat types. For instance, blue for economy, gold for VIP, or red for premium views.
Step 2: Identify Key Features and Amenities
-
Entrances/Exits: Look for door symbols or arrows. These show where you’ll enter and exit the venue, which is especially helpful for planning your route or quick exits.
-
Amenities: Restrooms, concessions, and first aid stations are often marked with universal icons (e.g., fork and knife for food, cross for medical).
-
Accessible Seating: Marked by a wheelchair icon, these areas are designed for guests with mobility needs and usually offer extra space and easy access.
-
Obstructions: Some charts highlight seats with restricted views using a shaded area, dashed outline, or a warning symbol. Always check for these before booking!
Step 3: Decode Section Labels and Numbering Systems
-
Section numbers may increase clockwise or counterclockwise from the main entrance or stage. Check the venue key or legend for orientation.
-
Row labels typically start at the front and progress toward the back. In most cases, Row A is closest to the stage or field.
-
Seat numbers often begin on the left as you face the stage, but this can vary—always consult the chart’s legend or ask staff if you’re unsure.
Step 4: Use the Legend or Key for Abbreviations and Symbols
-
Most seating chart prints include a legend explaining abbreviations and icons. For example, “GA” means General Admission (no assigned seat), while “VIP” marks premium access.
-
Common abbreviations you might see:
-
ADA: Accessible seating
-
GA: General Admission
-
VIP: Very Important Person/premium section
-
OB: Obstructed View
-
Step 5: Follow a Simple Checklist for Any Seating Chart
| Checklist Item | What to Look For |
|---|---|
| Find Your Section | Locate the section label on the chart and match it to your ticket |
| Identify Your Row | Check row labels (alphabetical or numerical) within your section |
| Spot Your Seat Number | Find the seat number sequence in your row |
| Review Symbols/Icons | Look for accessibility, amenities, or obstructions |
| Note Entrances/Exits | Plan your route to and from your seat |
| Check the Legend | Decode any unfamiliar abbreviations or color codes |
Pro Tips for Navigating Any Venue Map
-
Use an official seating chart template from the venue or ticketing site to avoid outdated or inaccurate maps (Travelzoo).
-
If you’re attending a high-demand event, double-check your seat location and be ready with your ticket details for a smooth entry.
-
For events with dynamic pricing or multiple configurations (like concerts with different stage setups), always review the latest chart before purchasing.
With these steps, you’ll move from confusion to confidence—no matter how complex the venue. Up next, we’ll share expert strategies for picking the best seat, so you can tailor your experience to your preferences and make the most of every event.
Pro Tips for Selecting the Ideal Seat
Ever wondered why some people always seem to land the best seat in the house —whether it’s at a sold-out concert, a championship game, or a hit Broadway show? The secret isn’t luck—it’s strategy. With so many options on any interactive seating chart , how do you pick the seat that will make your experience unforgettable? Let’s break down the advanced tactics that seasoned event-goers use to choose wisely, no matter the venue or event.
Step 1: Define Your Perfect Seat—Personal Preferences Matter
There’s no universally perfect seat. What’s ideal for you might be a dealbreaker for someone else. Start by asking yourself:
-
Do you prefer being close to the action, or would you rather have a panoramic view?
-
Is seeing facial expressions more important, or do you value hearing every note with perfect acoustics?
-
How much are you willing to spend for your ideal experience?
-
Do you have accessibility needs or require extra legroom?
Your definition of the best seat can change depending on the event and your priorities. For example, a theater lover might want to be center orchestra for a play but prefer balcony seats for a sweeping musical production (A Geek Girl's Guide). Being flexible and learning from past experiences will help you refine your preferences over time.
Step 2: Leverage Interactive Seating Charts for Informed Choices
Gone are the days of guessing what your view will be like. Today’s interactive seating chart tools let you:
-
Click on individual seats to see real-time availability, pricing, and even seat views or 3D perspectives.
-
Filter options by price, section, or proximity to the stage or field.
-
Spot accessible seating, premium amenities, and potential obstructions before you buy.
Using these digital maps makes it easy to compare options side by side and visualize your experience before committing.
Step 3: Research User Reviews and "View from My Seat" Photos
Want a real-world perspective? Check out crowd-sourced platforms like "A View From My Seat" or browse user-uploaded photos and reviews on ticketing sites. These resources reveal:
-
Actual sightlines and potential obstructions.
-
Comfort and legroom in specific sections.
-
Noise levels, proximity to amenities, and overall atmosphere.
Reading these insights can help you avoid disappointment and zero in on seats that consistently get high marks from other attendees.
Step 4: Consider Event Type and Venue Features
-
Concerts: For amplified shows, sightlines are usually more important than acoustics—aim for seats near the soundboard for balanced audio. For orchestral or acoustic performances, balcony or mid-orchestra seats often offer the best blend of sound and view (Acentech).
-
Sports: Sideline seats provide a balanced view of the action, while end zone or outfield seats offer unique perspectives and energy. Club sections and suites add comfort and amenities.
-
Theater: Center seats, about one-third to halfway back, allow you to see facial expressions and enjoy immersive sound. Avoid extreme sides or seats under overhangs, which can muffle audio or block views.
-
Special Venues: For outdoor amphitheaters or immersive venues, consider factors like weather, shade, and technology features (such as haptic seats or panoramic screens).
Step 5: Balance Budget and Value
-
Set your budget before browsing. Premium seats come at a price, but sometimes mid-tier options offer the best value for your money.
-
Be open to multiple sections—have a first, second, and third choice in mind to avoid disappointment if your top pick sells out.
-
Register for pre-sales or subscribe to venue newsletters to get early access to tickets.
Actionable Checklist: How to Secure the Best Seat in the House
| Action | Why It Matters |
|---|---|
| Define your ideal seat (view, comfort, price) | Ensures you target seats that fit your unique preferences |
| Use interactive seating charts | Visualize options and avoid surprises |
| Read user reviews and view photos | Spot hidden pros and cons before you buy |
| Consider event and venue specifics | Tailor your seat choice to the experience you want |
| Balance budget with value | Maximize experience without overspending |
| Have backup options ready | Increases your chances of securing a great seat |
By following these steps, you’ll consistently pick seats that match your needs—whether you’re chasing the energy of the front row, the clarity of the balcony, or the comfort of a premium section. Next, let’s wrap up with a summary of key takeaways and point you toward helpful resources for mastering seating chart organization at any event.
Conclusion & Next Steps
When you reflect on all the moving parts of event planning, one detail stands out for its power to shape experiences: the seating chart. Sounds simple, but as you’ve seen throughout this guide, mastering seating chart solutions is key to transforming chaos into comfort—whether you’re hosting a stadium concert, a wedding, or a classroom session. So, what are the biggest takeaways, and how can you put them into action for your next event?
Why Seating Chart Organization Matters?
Imagine walking into an event where every guest finds their seat with ease, enjoys the company of friends or colleagues, and feels included. That’s the magic of thoughtful seating chart organization. Across all types of venues and gatherings, a well-planned chart:
-
Reduces confusion and stress for attendees
-
Streamlines logistics for planners and vendors
-
Improves accessibility and comfort for everyone—including those with special needs
-
Encourages positive social dynamics and memorable interactions
-
Provides a roadmap for future events and continuous improvement
Whether you’re navigating the complexities of a stadium, designing an immersive venue experience, or arranging tables for a wedding, the right seating chart brings order and clarity to every occasion.
Actionable Insights to Apply Now
| Key Lesson | How to Use It |
|---|---|
| Understand the venue and event type | Choose a layout—arena, banquet, classroom—that fits your goals |
| Organize guest data before designing | Group by relationships, needs, or preferences for smoother assignments |
| Leverage digital tools and templates | Use online table makers for drag-and-drop editing, sharing, and easy updates |
| Prioritize accessibility and comfort | Ensure clear pathways, consider special needs, and balance social dynamics |
| Communicate seating clearly | Provide printed or digital charts, and coordinate with staff or ushers |
Streamline Your Workflow with the Right Tools
Still feeling overwhelmed by the choices or worried about last-minute changes? Here’s where the right digital tools make all the difference. Online table makers and seating chart solutions—especially those with drag-and-drop features, real-time collaboration, and customizable templates—empower you to:
-
Visualize complex layouts instantly
-
Adjust assignments on the fly as RSVPs change
-
Collaborate with co-planners, vendors, or teachers effortlessly
-
Export, print, or share charts for a polished, professional finish
If you’re searching for a curated, up-to-date guide to the best free online table makers (including advanced options for HTML, Markdown, and offline-first workflows), don’t miss the AFFiNE blog’s comprehensive resource. This article breaks down the top tools, highlights their unique strengths, and shows how platforms like AFFiNE combine flexibility, collaboration, and powerful data organization—making them ideal for any seating chart project, big or small.
Your Next Step: Put Your Knowledge into Practice
Ready to take control of your next event? Start by applying the strategies and checklists from this guide to your own seating chart organization. Experiment with different layouts, try out digital tools, and don’t be afraid to iterate until you find what works best for your needs. And when you want to save time and boost your confidence, let expert-curated resources like the AFFiNE blog point you to the best solutions for streamlined, stress-free planning.
Every great event begins with a seat—and every seat deserves thoughtful planning. Use what you’ve learned here to create seating charts that delight guests, simplify logistics, and set the stage for unforgettable experiences. Your next event is just a chart away from success!
Frequently Asked Questions About Seating Charts
1. What is a seating chart and why is it important for events?
A seating chart is a visual plan that assigns people to specific seats or tables at an event. It streamlines guest flow, enhances attendee comfort, and helps organizers manage logistics, accessibility, and social dynamics efficiently.
2. How do I choose the best seat using a seating chart?
To choose the best seat, use interactive seating charts to compare views, check user reviews for comfort and sightlines, and consider your preferences for proximity, amenities, and budget. Look for official charts to avoid outdated information.
3. What tools can help me create a seating chart for a wedding or event?
Digital tools like AFFiNE and other free online table makers offer drag-and-drop layouts, guest list management, and collaboration features. These tools simplify organizing guest data and visually arranging seats for any event.
4. How can I make a seating chart accessible for guests with special needs?
To ensure accessibility, use seating charts that clearly mark accessible seats, provide easy access to entrances and amenities, and consider special requirements when assigning seats. Digital tools allow you to flag and accommodate these needs easily.
5. Where can I find free seating chart templates or makers?
You can find curated lists of free seating chart makers and templates on resources like the AFFiNE blog, which reviews and compares top online tools for weddings, classrooms, and event planning.